Have you ever wondered what would you do if your machine crashes and you don’t have access to your NextCloudPi data (and yes, you always forget to create a backup)? Or maybe if there is a way to connect your NCP with someone else’s on the same LAN and share your data? Then you should stay tuned and consider
making your NextCloudPi highly available.
In order to make NextCloudPi highly available, emphasis should be given to the fundamental key of Nextcloud’s service: data storage. Thus, in our case high availability is equal to having replicated and
persistent data over multiple machines running NextCloudPi docker image.
In this tutorial, we will use Docker Swarm and GlusterFS to achieve our goal. A brief summary of these two is given below:
Docker Swarm: Docker Swarm is a tool to create and maintain – or else orchestrate – a cluster of Docker hosts. Docker hosts are remote machines, either VMs or physical machines which are running the Docker Daemon. Swarm system is created by a node, named manager, who is actually the leader (multiple managers can be added to the system) and monitors the other nodes, called workers. The whole idea is about merging multiple machines into a single logical virtual server. By distributing an application over multiple Docker hosts instead of just one, we gain availability and high performance.
GlusterFS: GlusterFS is a distributed software based file system. In distributed systems, data is spread over different nodes but all of them have a common view point of all the files separated among them, which they can easily access without knowing the actual location of the file. The nodes that are running the GlusterFS daemon can get connected with each other into a cluster, where they can share a directory called brick, by mounting a volume – a logical collection of bricks – under a specified mode (distributed, replicated or striped).
Here’s how these tools will help us with our scenario:
Docker Swarm will deploy NextCloudPi stack and distribute ncp services over multiple nodes at a preferred scale, whereas joining all nodes of the swarm system together in a GlusterFS cluster will offer us replication and data persistence of the data storage.
The whole process is described below step by step, but you can also find an automation script at the end.
Input: Specify your resources
At the beginning, the script will prompt user to choose between several options about the resources that are going to be used.
First, user is prompted to choose if the script should get host’s IP automatically, or in case there are multiple IPs that the host is listening to, the user can specifically give one as input.
The automation script will also prompt user to choose between using existing machines as worker nodes or let it create new VMs through Vagrant.
Use existing machines: Choosing this option, the user will be asked to give as input IP and user (a sudoer) of each worker machine and also choose between either adding manually host’s public key to the authorized_keys files of each node or let the script fix it automatically. The latter will ask the user to provide password for each machine as input and also choose between using default public key (id_rsa) or specifying another one.Package sshpass is required to be installed at host’s machine for this option.
Vagrant Option: This option will let the automation script create automatically lightweight VMs according to a provided Vagrantfile. The user can manually adapt the specs of the VM to his needs, through the Vagrantfile. The new VMs will be given the following IPs of leader’s IP accordingly. Vagrant is required for this option.
Setting up Docker Swarm and GlusterFS on Manager
Now that we have all the information needed, the setting up of the system begins.
The Swarm system will be created by the host machine, which will be the system’s manager. For this example, let’s agree on host’s role being exclusively to monitor the worker nodes and not running a NextCloudPi instance. However, there will be a directory where all data of the GlusterFS cluster will be copied on host as well.
If you want host to be running NextCloudPi as well, skip setting the drain mode, add 1 to the scale up of NCP stack, make sure you deploy NCP stack before running Gluster’s container on host and replace swstorage directory with the respective directory of the shared volume on GlusterFS commands, like we do on workers.
After executing the following command, the Swarm system is ready to welcome new nodes:
$ docker swarm init advertise-addr
Now, it’s time to setup GlusterFS on host. We chose to use GlusteFS docker image for the automation script, in order to make it portable and applicable on every OS.
However, we should mention the insecurity that derives from the GlusterFS privileged container. Be careful with the sigint signals, as it may be handled by the container, but cause a host shutdown as well. A workaround would be installing GlusterFS natively on every node, but this is up to you, as it’s not automated.
So, the first thing to do is create an overlay internal network to be used by the GlusterFS cluster. This type of networking offers a distributed network among multiple Docker daemon hosts and combined with the attachable option, which allows us to use docker run to create a container within the scope of this network, we have the default networking of Swarm.
The reason why we need this network, is because GlusterFS docker image demands privileged mode which is not compatible with Docker Swarm, and thus it cannot be deployed to Swarm stack. Therefore, we can only run Gluster as a service per node.
Execute the following command to create the overlay network:
About the GlusterFS container, as you can see it’s restart policy is set to always after exiting, so that the Gluster server is always alive to preserve replication and data persistence.
The automation script will execute some basic checks to know if everything works ok, and we’re ready to go on.
Extra services on host – optional
Before we proceed to the deployment of NCP stack, let’s run any services we need on host (later we will set host’s node to drain mode so we better run anything we need now).
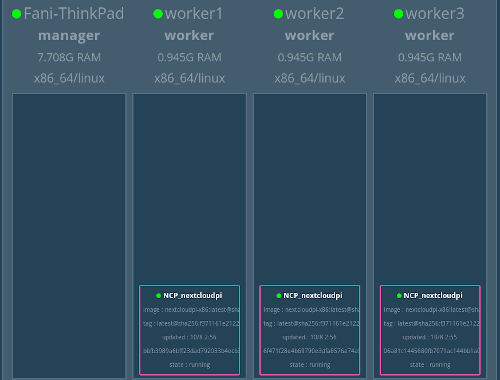
In order to get a clear picture of the Swarm system, there is a docker image which illustrates a visualizer and provides information about every node on the Swarm – status, services running, etc.
To get this visualizer, run the following container:
$ docker run -it -d -p 5000:8080 -v /var/run/docker.sock:/var/run/docker.sock dockersamples/visualizer
Now, just type localhost:5000 on your web browser and you should see something like this:
Workers on board
Time to welcome the remote machines, which will play the role of workers.
First, each machine should run the following command to enter the Swarm we created before:
In order to automate this process, we enter each one of the remote machines via ssh and execute each command.
Then, we deploy NCP stack on host’s machine – manager – and then scale it up to the number of workers:
$ docker node update --availability drain $(hostname)
$ docker deploy --compose-file docker-compose.yml NCP
$ docker service scale NCP_nextcloudpi=<number of workers>
$ docker node update --availability active $(hostname)
The reason why we set manager to drain mode before deploying the stack is because we do not want it to run NextCloudPi. After the replicas are distributed to the workers, the manager can be set to active mode again.
All of our workers are now running NextCloudPi and all we need to do is sync their storage.
Using ssh again we will execute the following commands on each node to run GlusterFS container (the automation script uses gluster_setup.sh, which includes the commands below):
The only difference between a worker’s GlusterFS setup and manager’s is that while manager mounts directory swstorage, the worker mounts a directory situated under /var/lib/docker/volumes because the directory we want to mount is the docker volume that NextCloudPi’s container is using, and it already exists because NextCloudPi is initialized.
So, now all nodes are running GlusterFS. But how do we connect them?
Creating the cluster and the replicated volume is manager’s job, so we enter gluster’s container on host and execute the following commands according to the number of workers we have:
$ docker exec gfsc0 gluster peer probe gfsc1
$ docker exec gfsc0 gluster peer probe gfsc2
$ docker exec gfsc0 gluster peer probe gfsc3
…
$ docker exec gfsc0 gluster volume create gv0 replica  gfsc0:/bricks /brick1/gv0 gfsc1:/bricks/brick1/gv0 gfsc2:/bricks/brick1/gv0 gfsc3:/bricks/brick1/gv0 # ( and so on if there are more workers…)
$ docker exec gfsc0 gluster volume start gv0
$ docker exec gfsc0 mount.glusterfs gfsc0:/gv0 $(pwd)/swstorage
All workers have to mount the volume also from their side, as follows (the automation script runs gluster_volume.sh per node):
This is it! The volume is ready to be shared among the members of the Swarm system. There is one last thing to do though in order to make it visible to the web interface of NextCloudPi. Fix the owner group of the shared directory on every node like follows (this is also included inside gluster_volume.sh):
Both Swarm system and GlusterFS are now up and running. Everything that exists inside directory swarm is now replicated to all nodes.
What you have to do in order to see files coming from different nodes through the web panel, is enable auto scan (nc-scan-auto) for path ‘/ncp/files/swarm’, so that the files are visible as soon as they are copied to each machine. Otherwise, you will be able to see them only when you manually scan swarm directory (nc-scan).
Other features
Concurrent Docker downloads
If you’ve chosen the path of setting up the Swarm system manually and you’re using VMs on host as workers, then make sure that Docker daemon on host permits concurrent downloads of docker images. Set the limit up to the number of workers, in order to download GlusterFS image concurrently.
$ echo $"{
   "max-concurrent-downloads":<number_of_workers>
 }" | sudo tee /etc/docker/daemon.json
$ sudo service docker restart
After setting up the Swarm system you may realize that you need more nodes on it. You don’t have to break it down and set it up again, you can connect new nodes to swarm and GlusterFS cluster easily by following the next steps:
On new machine, execute the same command we used before to add it to the Swarm system.
On host, set manager to drain mode, scale up to num_of_workers + 1, set to active mode
On new machine, setup GlusterFS and run Gluster container.
On host, execute the following commands to add the new node to the cluster:
On new machine, mount Gluster’s volume and chown the new directory.
The above process is automated by the script extra_node.sh.
Automation script
You can find the automation script and its dependencies here.
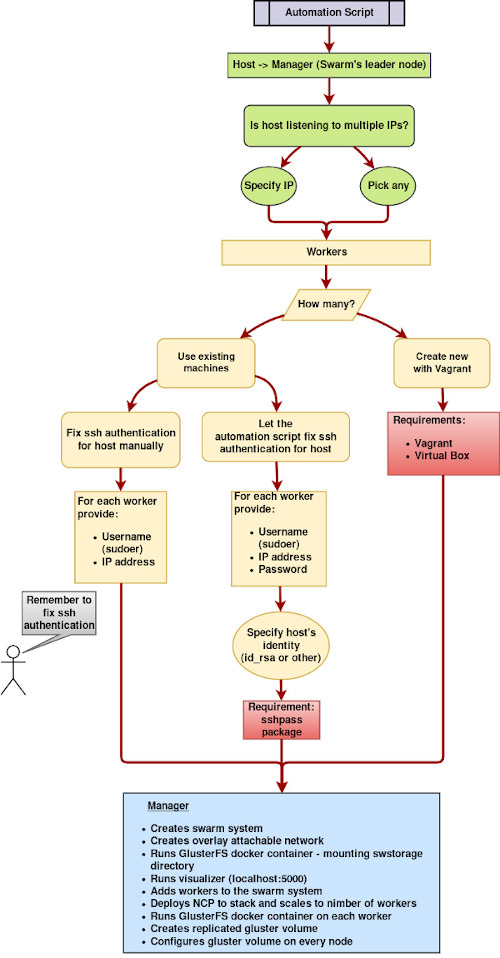
Visually, the automation script works like this:
Just run create_swarm.sh and it will guide you through the whole process.
Happy clustering!
Vagrant VM
23 August 2019
This article addresses you, who avoid words like Docker or Vagrant (but please consider getting over it soon…), and you do not want to know more than you need about the configuration of NextCloudPi and a VM and you also can’t afford to buy a board computer. There is a ready-to-go solution for you too, friend.
Below you can find an automation script which does all the nasty work for you, configuring a NextCloudPi VM, just by prompting you to answer some simple questions – do not worry there are also details provided so that you don’t get messed up.
Moreover, it provides the option to easy clone an already created VM so that you can have multiple machines (What for? Check my previous article Highly Available NextCloudPi to find out 😉 ). This way you can have a faster setup of your NCP VM, by skipping the installation of NCP and – sometimes – even avoiding the box import (large) overhead in terms of time.
The only requirement is to install VirtualBox and Vagrant.
Let’s break it down and get into this script’s logic and see what options it offers.
Let’s face the truth. VirtualBox is one of the most popular software virtualization packages – especially among beginners level. Even though desktop virtualization lacks the benefits of the others (operating-system level virtualization like docker is way more portable and faster, and hypervisors type 1 – bare metal – are highly secure), VirtualBox has become prominent for some good reasons: it’s super easy and convenient to use, free and also cross-platform compatible.
So, even if I am a containers person – Docker now and forever – I’ve gone deep down in the configuration of a VirtualBox machine, and I’m offering you all the available settings for NCP on VBox.
Of course, I wouldn’t have gone this far if VirtualBox was not supported by Vagrant as a provider.
Vagrant is an excellent tool to work with virtual environments, and most often this means virtual machines. It offers a generic command-line client to configure and manage any virtual environment it supports. The “recipe” of how to do so resides in a template file, called Vagrantfile. With Vagrantfile one can define a whole environment in code which makes it easily reusable and easy to modify and share.
As you may guess, I used a Vagrantfile to setup NextCloudPi. The official Github repository of NCP offers a Vagrantfile, which I used as a base and enriched it with more specific instructions, addressing VirtualBox specifically.
Combining VirtualBox and Vagrant, I created an automation script which prompts user to give some input about the resources of the VM and the preferred networking, providing details about each one of them. Then the script either creates a new VM or clones an existing VM, according to user’s input. This makes a beginners life easier as all he has to do is have some interaction with the script and answering some questions.
New VM
Let’s execute the script and examine each step through an example.
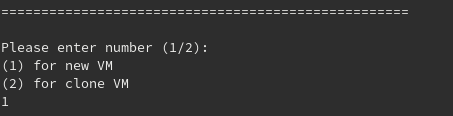
The first thing the script needs to know is if user want to create a new VM or clone an existing VM.
It then asks to provide a name for the VM. If you hit enter you get the default name ‘NextCloudPi’. Don’t worry if the name is taken. VBoxManage will be used to check this for you, and you will be notified if it does. So good, so far.
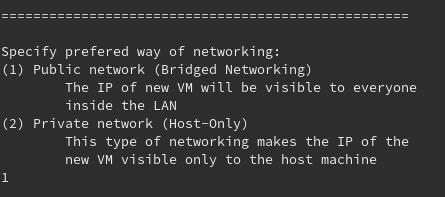
Ok, this may be the most difficult for a beginner to answer, so let’s talk about it.
VirtualBox VMs have a variety of networking ways to choose from. Two of them, are the ones you see above. They are the most convenient networking options for setting up NextCloudPi. These two will get you an IP address to refer to your NCP directly – it’s better to avoid port forwarding option for an easy setup…
Public network, or Bridged networking as VirtualBox calls this option, offers an IP to the VM which is reachable by any machine in the same LAN. This means, that anyone who is using another machine, physical or VM, and has access to your NCP, can use it. The Vagrantfile command responsible for this type of network is the following (bridge will be given the value of host’s interface):
Private network, or Host-Only networking, is offering an IP as well, but this IP is coming from a private network and thus, it’s only reachable by the host or other VMs on the host. Anybody else on the LAN who uses remote physical machine cannot use your NCP. Also, this option does not waste an IP address of your LAN. The automation script will use the default range of DHCP on VBox (vboxnet0). If you want to modify this, check the pick_ip function. As for the responsible command in Vagrantfile:
So you should choose depending on the accessibility of your NextCloudPi. If you’re accessing it only through your host, then a private network will work for you. If you want to be able to access it from various hosts, then go for a public network. If you still don’t know, just go for public and make sure you don’t hand your NCP password around.
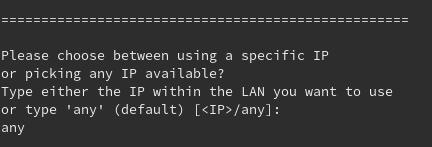
Time to make the IP address of the VM specific. If you have a favourite number or anything, give it a try and the automation script will tell you if the IP you specified is valid (check function valid_ip) and not reserved (check function reserved_ip). About the latter, it will try to ping the IP you specified and check if it’s responded, however this trick won’t work if it’s assigned to a firewalled device.
If you let the script pick an IP (option ‘any’), it will use host’s IP and host’s interface to get to the range of your LAN and will pick the first IP available.
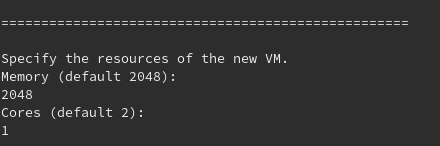
The last thing that you can configure on your VM is its resources. That depends just on your host and the resources you can provide to your NCP VM. Just specify memory and cpu, plain and simple. If you hit enter, the default values will be provided as input.
The commands used for this configuration in Vagrantfile are the following:
config.vm.provider "virtualbox" do |v|
  # Resources
  v.memory = 2048
  v.cpus = 1
  # VM name
  v.name = "MyNextCloudPi"
end
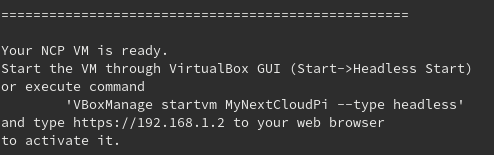
That’s it! You got your NCP VM created. You can start it either through the VirtualBox GUI (Headless start will do the work, if you just want to use the web panel) or by using the command specified ( VBoxManage startvm MyNextCloudPi –type headless ) – if VBoxManage package is installed, if it’s not the script won’t even tell you about the command.
In the output message you can see the IP that was eventually assigned to your VM.
Clone VM
Now that you’ve created your first NCP VM, let’s see how you can easily clone it.
We will skip the questions we explained before, and focus on the extra questions that you will be asked to answer for this option.
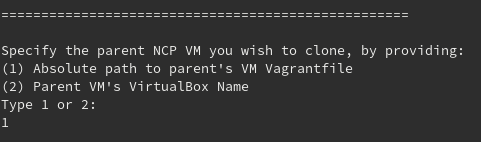
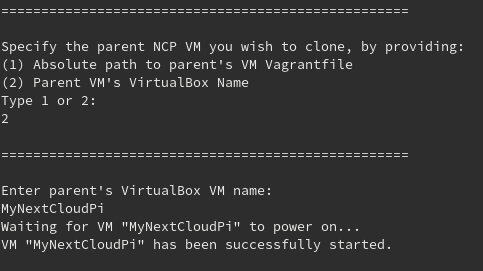
The first thing that the script will ask you about the cloning is to choose between two options:
Absolute path to parent’s VM Vagrantfile: If you used the automation script for the creation of the parent VM, then there is a Vagrantfile under the VM’s directory you created. In this case, the script will parse the Vagrantfile to get some info about the parent VM (IP and name), so that the cloned VM will not use the same and cause any conflict.
You may have not used the automation script, but created a VM with your own Vagrantfile. That should work, too. But if the required details are not found inside the Vagrantfile, then the script will need to start the parent VM (in case that it’s not already running), either on its own using VBoxManage or with your manual help
Parent VM’s VirtualBox Name: If you remember the name of the VM that you want to clone, then choose this option. This option will not need to parse any Vagrantfile, it will just start the parent VM so that its assigned IP is excluded from the available set of IPs. VBoxManage will be used once again to check that the parent VM exists and if not, you will be notified.
Tip: VBoxManage is the command-line interface to VirtualBox and the commands that the automation script uses are the following:
VBoxManage list vms : Lists all existing VirtualBox VMs
VBoxManage startvm ${VBox_name} –type headless : Starts a VirtualBox VM with headless mode start
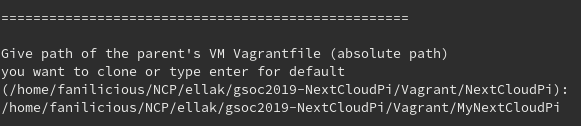
1. Vagrantfile’s path
If you’ve chosen this option, then you should obviously be prompted to specify this path:
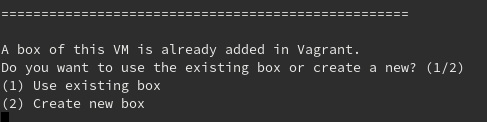
The automation script will check the path for any existing packaged boxes and if there is any, you will be asked if you want to use it:
If you do choose to use it (Use existing box), any metadata of boxes with the name of this path will be removed. Let’s explain this part.
Vagrant has a command to package a VM into a box: vagrant package
This command will create file ‘package.box‘.
If a Vagrantfile uses this box to create a VM, then it will be automatically imported into Vagrant’s metadata, so that it can be reused with the name of the path (box: ‘path/to/box/package.box’).
But if the package.box is not used in a Vagrantfile or never created a VM with it, then it may not be added to the metadata.
So, a package.box that exists in a directory may be of a more recent version of the VM than the same name existing in Vagrant’s metadata (Imagine the scenario of somebody using vagrant package but never using this package.box to create a new VM).
If you’re not sure which version of the parent NCP VM it refers, then stick to the Create new box option.
This option will use the vagrant package command we mentioned before and will create a package.box file, which will be imported to the new Vagrantfile.
What happens if there is no existing package.box of the parent VM, but there is one box name related to parent’s path inside Vagrant’s metadata? Automation script will search for it and will ask you a similar question:
The options in this case are equal to the ones we mentioned when a package.box exists.
2. Parent’s VBox Name
This option is quite simple. You just specify parent VM’s name, VBoxManage will get it running, so as to exclude its IP, and the script will just use vagrant package –base parents_name to package it.
Metadata is not considered in this option, because specific named metadata will turn out to be very complicated. A name can be easily used twice for different boxes. Paths can be too, but it’s not so likely, as a name is. Thus, we just remove any metadata of parent’s name and we package the VM again.
No matter which option you choose, either Vagrantfile path or VirtualBox name, use existing package.box or existing metadata or create a package from scratch, you will end up with a new Vagrantfile, which the automation script will use to vagrant up and you will get your cloned VM. Just make sure you clone the version of the VM you want and not cloning an older package you forgot to delete.
Vagrantfile explained
You may be wondering what is this secret recipe that the produced Vagrantfile contains.
The new VM option has a Vagrantfile, quite similar to the one you can find at the official repository of nextcloudpi. It uses a debian box (you can specify the release), defines box name and hostname and installs NextCloudPi on it. The automation script will just add the VirtualBox specific commands we mentioned above, about the resources, networking and name of VM.
As for the cloned VM‘s Vagrantfile, it will change the box name from debian to the path of the package.box created, define hostname and VirtualBox configuration and the shell script will not have to do anything about NCP, as it is already installed (clone remember?).
There is one thing though that we have not mentioned yet, which is of utmost importance for cloning a VM.
Vagrant uses ssh to access a VM. In order to do this, it needs an ssh key. So which is it at first boot since we haven’t provided anything?
There is a publicly shared ssh keypair provided by Vagrant, named vagrant insecure key (obviously it’s insecure since everybody can have this). This key is used by Vagrant for the first boot and then it generates a new keypair.
However, since we are actually creating a new base box, we want each NextCloudPi VM to be able to get cloned anytime. Thus, in every Vagrantfile we download the public vagrant insecure key and add it to the authorized_keys file of the VM. Also, Vagrant needs some specific permissions on ssh files (/home/vagrant/.ssh needs 0700 mode and /home/vagrant/.ssh/authorized_keys needs 0600 mode) so we execute the appropriate chmod commands. This constitutes a VM clonable.
Since, the NCP VMs created by the script have the public vagrant insecure key in authorized_keys, we need to show Vagrant which private key to use on first boot by adding the following commands on every Vagrantfile:
# First boot use vagrant insecure key
config.ssh.private_key_path = '~/.vagrant.d/insecure_private_key'
config.ssh.insert_key = false
This way, the know issue of not responding ssh after vagrant package is avoided.
Automation script
Enough talking. Go check it yourself and give me feedback if you find this useful.
It’s time for NextCloudPi to get adapted to the modern software development, Continuous Integration / Continuous Delivery. This is an implementation that should be done, in order to reduce risks for each build, automate the production and testing and clear the way to get valuable features out to users faster. Thus, one of my GSoC tasks was to create this missing feature.
If you’re trying to create a travis.yml file for a project like NCP, you’re also welcome to read this article, as I will go through the whole process till the final travis.yml.
The first thing I had to figure out was which CI/CD system to use. NextCloudPi project has a git repository on GitHub, which means that the choices among the CI systems were limited. The CI system that I finally decided to use was Travis CI.
Travis CI is a hosted continuous integration service used to build and test software projects hosted at GitHub. Travis is recommended for open source projects and is also cloud-based and supported by Docker to run tests, which in NCP case is important, since docker images exist as an alternative to arm images.
As of now, the .travis.yml that I created produces only NextCloudPi’s docker images (and its component docker images: debian-ncp, lamp and nextcloud) and not the native images, due to some issue I’m experiencing with the Locales.
One may wonder, why not use Docker automated builds then? It’s a fact that Docker itself is capable of automatically building images from github repos. However, it currently uses the stable version of Docker – thus, no experimental features are supported – and doesn’t allow to specify a certain Docker daemon. NextCloudPi’s Dockerfiles are using experimental features and therefore, using Travis CI to automate builds, is the best choice.
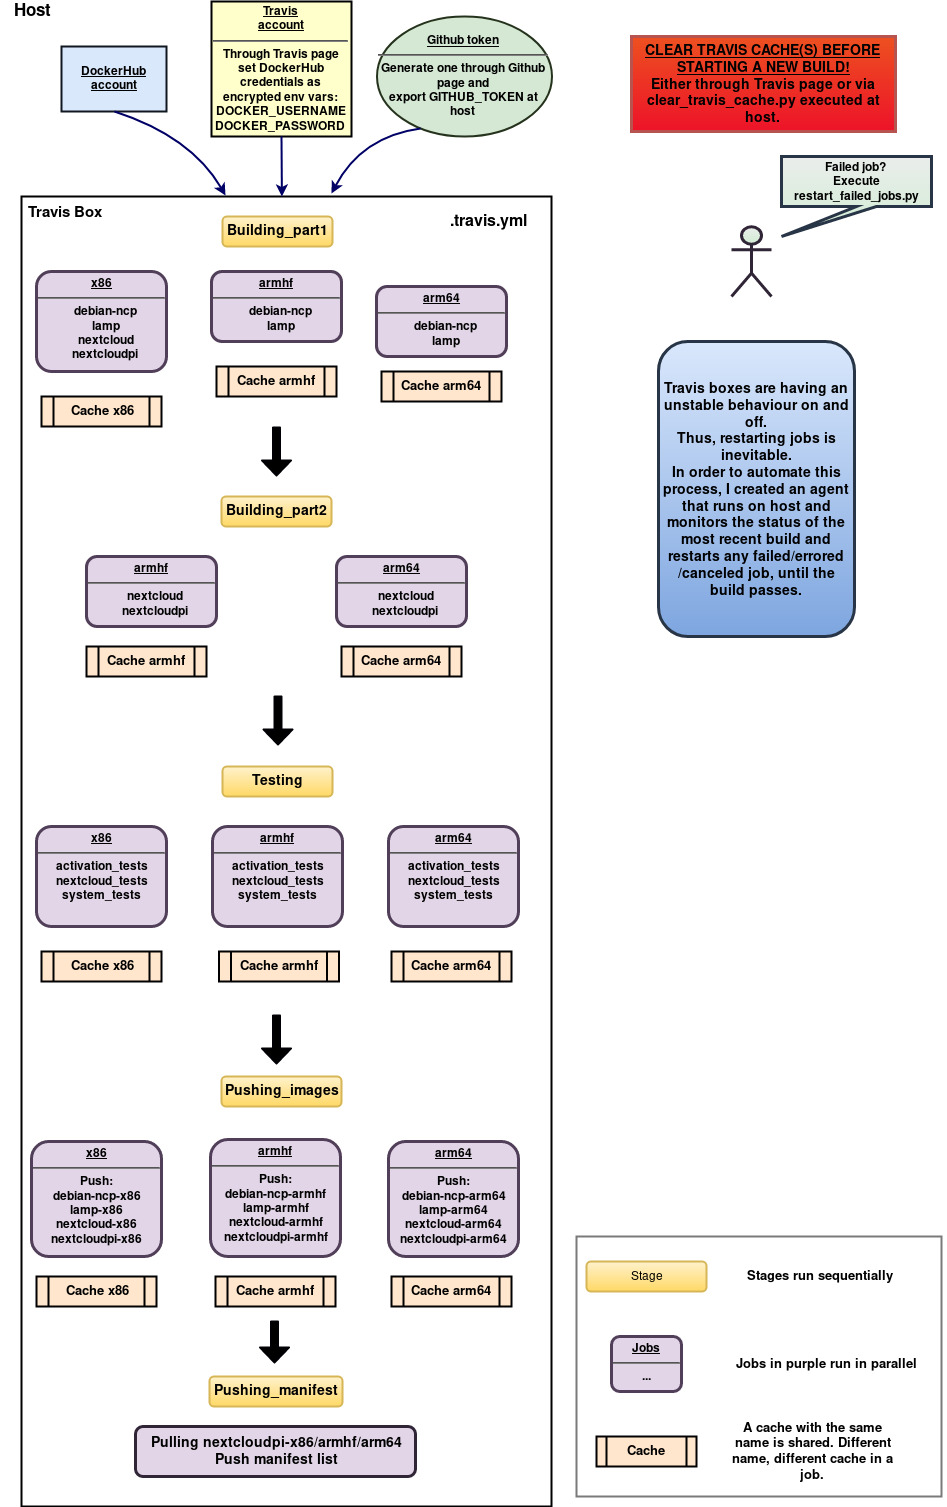
The .travis.yml I created is explained in the following image:
Let’s break it down and explain each step.
Briefly, what Travis really does is cloning your git repository and run the commands of travis.yml on a machine. You can specify some details about the machine that will be used, but the choices are quite limited.
The first thing to do in a travis.yml is specify some details about the machine and your work like: do you need sudo? what languages are you using? what OS you need? which branches of your repo should be checked?
In our case, we definitely need sudo and we picked the generic pack of languages which contains Docker and python and we’ll install anything else we need. As for the OS, Ubuntu xenial, was the best option at the time of writing the travis.yml file.
Also, it’s important to specify when should the Travis CI build take place. If you don’t specify this, it will just build on every single git commit you push. If you want it to build only when you tag a git commit – the so called build tags – then add the following line:
if: tag IS present
Now, let’s talk about the Travis ecosystem terms.
In Travis, a block of code can constitute a Job. A job contains commands that run sequentially, inside the same VM. There is one big limitation though about the time of a job’s execution: it should not exceed the limit of 50 minutes. After 50′ the job fails and thus, the whole build fails (if it’s not manually specified to ignore a job’s failure).
A job’s lifecycle splits up to the following parts (install and script are the most often used):
before_install
install: install any dependencies required
script: run the build script
before_script
after_success/after_failure
deploy
after_script
These parts can be omitted. In our case, we use install for any packages required, script for the main work and sometimes the before_script to configure stuff.
Different jobs can run concurrently, within an entity called Stage. Stages – or as they are often called, Build Stages – can contain multiple parallel jobs and don’t have any time limit – except for the one of each job. Stages can only run sequentially among them. What’s of utmost importance to mention for stages, is that each stage runs on a fresh, independent VM.
What happens when you need to break your code down in stages (maybe due to the jobs time limit) but need some data from the previous stage to go on? Here comes the Cache. Travis offers a caching strategy which you can use to transfer your data from stage to stage. The cache can be defined as a directory, and inside it we can store data and the following stages will be able to access it directly.
Combining these concepts, I decided to split the travis.yml into 3 stages: Building docker images, Testing and Pushing to DockerHub. Each architecture is independent from the others, thus its docker image can have its own job inside every stage.
Every job/architecture is using its own cache so that the images built at the first stage can be transferred to the next stages (example of cache for x86):
env:
  CACHE_NAME=X86
Make sure that any parallel jobs in Travis should have distinct names for their cache, otherwise the same cache will be used and all processes accessing it will cause errors in your build!
Also, in every stage we install Docker with the convenience script because we need a recent release of Docker (at least 18.09), which supports the experimental features and Travis is not yet updating to this release automatically. A bash script like the following, will do the trick:
#!/bin/bash

set -o errexit

echo "INFO:
Updating docker configuration
"
curl -fsSL https://get.docker.com -o get-docker.sh
sudo sh get-docker.sh
echo $'{
  "experimental": true,
  "storage-driver": "overlay2"
}' | sudo tee /etc/docker/daemon.json
sudo service docker restart
After it, in order to enable the experimental features don’t forget to export the respective var:
export DOCKER_CLI_EXPERIMENTAL=enabled
Building docker images
At this stage, each architecture job will build the docker images needed for NextCloudPi: ncp-debian, lamp, nextcloud and nextcloudpi. Then they save the docker image in a tar file inside their cache.
Through this stage, I learned the hard way that Travis has much more limitations than the 50 minutes per job.
A job fails when there is no produced output for more than 10 minutes.. I solved this by adding the following line before any other command in the script section:
while sleep 9m; do echo "=====[ $SECONDS seconds, build-docker still building... ]====="; done &
Also, there is a limitation about the log output. So if you encountered an error that says “The log length has exceeded the limit of 4 Megabytes“, then guess what? You should produce output less than 4 MB. :’) In my yml, I just redirect the long command’s output to a file and if you want to monitor it just follow the output file using this command:
tail -f output &
The armhf images were struggling not to exceed the time limit and therefore, I split the Building Stage into two Stages: part 1 and part 2. Arm images build ncp-debian and lamp at part 1 (x86 is pretty fast so there is no need to split its stage) and in part 2, they load their lamp docker image and build nextcloud and nextcloudpi.
Lastly, I noticed that mysql was having trouble on starting properly as it was requesting more open files than the ulimit allowed. This shouldn’t be happening, as mysql usually calculates on its own the open files limit – the ulimit inside the docker container – but in Travis VM it didn’t (running the same docker images on my host, it worked just fine). So, what I did to solve this issue, was manually fixing the limit in mysql config file, via lamp.sh – using a sed command.
Testing
Finally, the building docker images jobs have passed and it’s time to test them using the headless tests provided by the nextcloudpi repository.
The requirements for this stage that had to be installed on Travis box were selenium and geckodriver – and of course since we have a fresh VM, Docker should be installed again.
The only image we need is nextcloudpi, so we load it and run the tests.
As soon as every job passes, this stage is complete.
Pushing to DockerHub
The last part of travis.yml focuses on pushing the docker images to DockerHub. They’re built and tested and ready to go public.
Each architecture will push its images and then we’ll create a manifest containing all the architectures.
Docker Manifest is a smart experimental tool which contains information about an image, such as layers, size and digest and extra information can be added by users like OS and architecture. This is why we often call manifest lists “multi-arch images”.
Manifest will need the nextcloudpi images of all architectures and thus, I decided to create separate stages: One for pushing the 4 components of nextcloudpi and one for pushing the manifest list of all architectures.
The first of these stages, loads the 4 images of each architecture per job, tags it and pushes it to DockerHub. The DockerHub credentials should be inserted through Travis page and in the yml use vars $DOCKER_USERNAME and $DOCKER_PASSWORD to login to DockerHub account and tag your image.
The last stage, needs one job only since all nextcloudpi images will be pushed together to the manifest list. Wondering which of the three caches will be used? None. The previous stage has pushed the images to DockerHub right? Why bother, waiting for any cache then? Just pull the images, login to Docker again and use docker commands manifest create and manifest annotate.
That’s it! The travis.yml is ready to be used. All you have to do is creating an account on Travis, associate it with Github, enable builds through Travis page, pass you DockerHub credentials and drop the yml we just created inside your repo as .travis.yml.
You can find the travis.yml I created for nextcloudpi here
Single architecture travis.yml
In order to provide an option for testing single architecture, or even pushing only one architecture to DockerHub, I created a script that generates mini travis.yml files for single architecture.
This script prompts the user to choose the architecture he wants and generates the respective file.
There are also some extra tools I created in order to automate the process of restarting failed jobs and cleaning the caches. You can read more about these tools here: Travis tools: Restart failed jobs and clean caches
Ansiblize NCP
27 August 2019
One of the tasks I was assigned on GSoC 2019 was to convert the whole server of NextCloudPi into Ansible. Meaning, I had to convert some really complicated bash scripts into Ansible playbooks.
This proved out to be very time consuming for the simple reason that I had never worked with Ansible before, and although it is a handy tool especially for IT people, it has quite a large learning curve and for somebody who is used to coding, it may be stiff to convert code into yml files and get into its logic.
But through this, I now understand why so many IT people are adopting it. Thus, it may be useful for NextCloudPi to have available Ansible playbooks for ncp-config.
Ansible is a universal language, unraveling the mystery of how work gets done. Ansible can be used to configure a server, deploy an application or automate a task. It can also do IT orchestration, and simplify the process of executing sequential actions on multiple servers or devices.
Bash scripts are convenient to convert to ansible, as most of shell commands have a respective module in Ansible.
This task is still a work in progress, so you cannot use it just yet. By now, the two – big – sections of NextCloudPi server, CONFIG and SYSTEM, have been implemented. Each of the bash script in the sections of ncp-config, splits its functions into distinct Ansible playbooks. As soon as everything is turned into Ansible, ncp-config will be edited to use these playbook instead of the bash scripts.
What I found out in the process of writing Ansible playbooks was that I was going over previous yml files to re-use commands that I have written. Thus I decided to create my own inventory to help me move faster with this task.
A series of articles will follow as a tutorial to convert bash blocks of code to ansible tasks and eventually create an Ansible playbook out of a bash script. NO you can’t “learn Ansible in 5 min” with it (and probably with no other guide..), but it may make your life easier to get used to it and have some basic commands alltogether.
Usage: Using Ansible to replace your bash scripts is easy Just make sure you give the correct names to the arguments you’re passing so that they correspond to the variable inside an Ansible playbook.
So the execution of a bash script which is like the following command:
./bash_script.sh argument1 argument2
Will be replaced by the following Ansible command:
If there are no arguments passing, you can skip the extra vars flag.
If the function replaced by ansible playbook is returning a value that you need, I have fixed it so that the following shell command will get you the returned value:
The same thing could be done by using the “fetch” option but that would require to convert the shell script so that it gets the input from the fetched folder.